Manual subgroup analyses
1. Create the first subgroup
In the 'Analysis' section, create and name the outcome for which you want to do a subgroup analysis (see Manual-input analyses for more details).
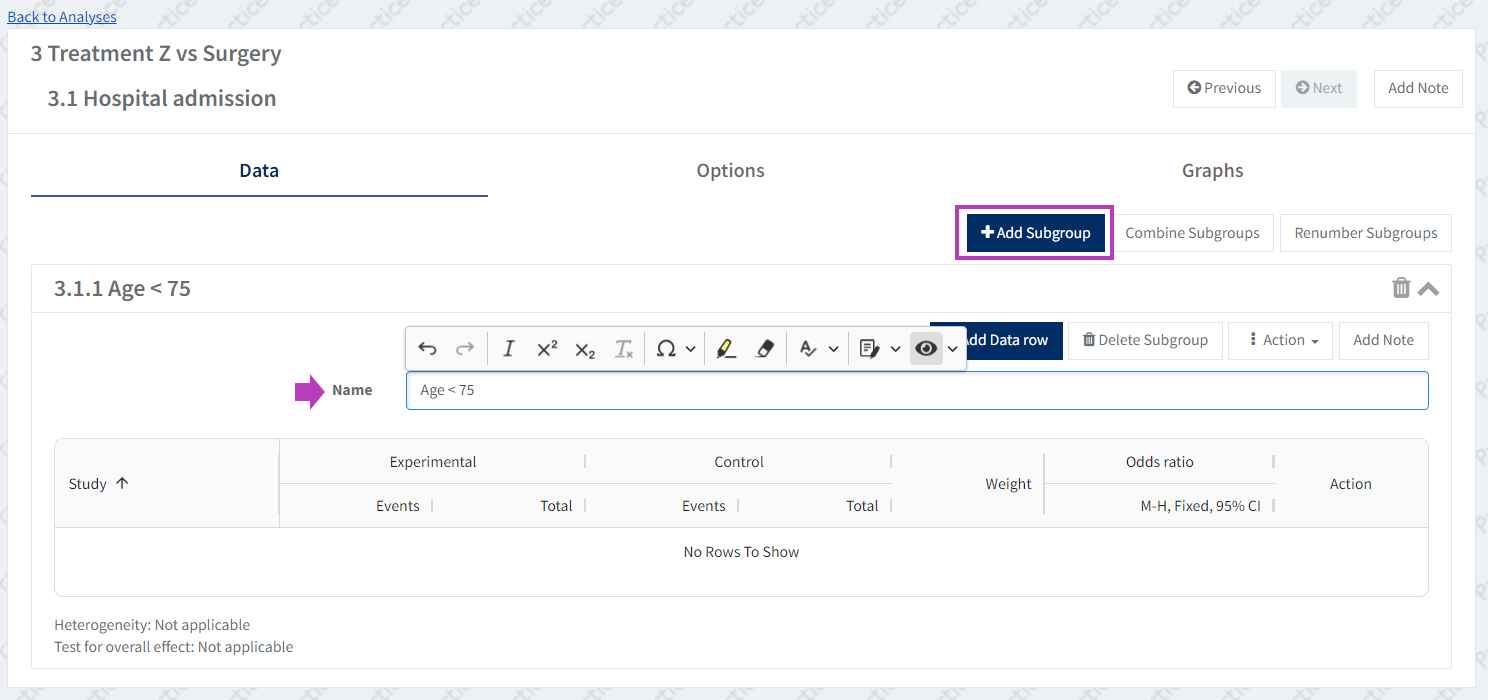
Click on the 'Add Subgroup' button and name the subgroup.
Select 'Add data row' to add the studies and the data to the table (see Manual-input analyses for more details).
2. Create additional subgroup(s)
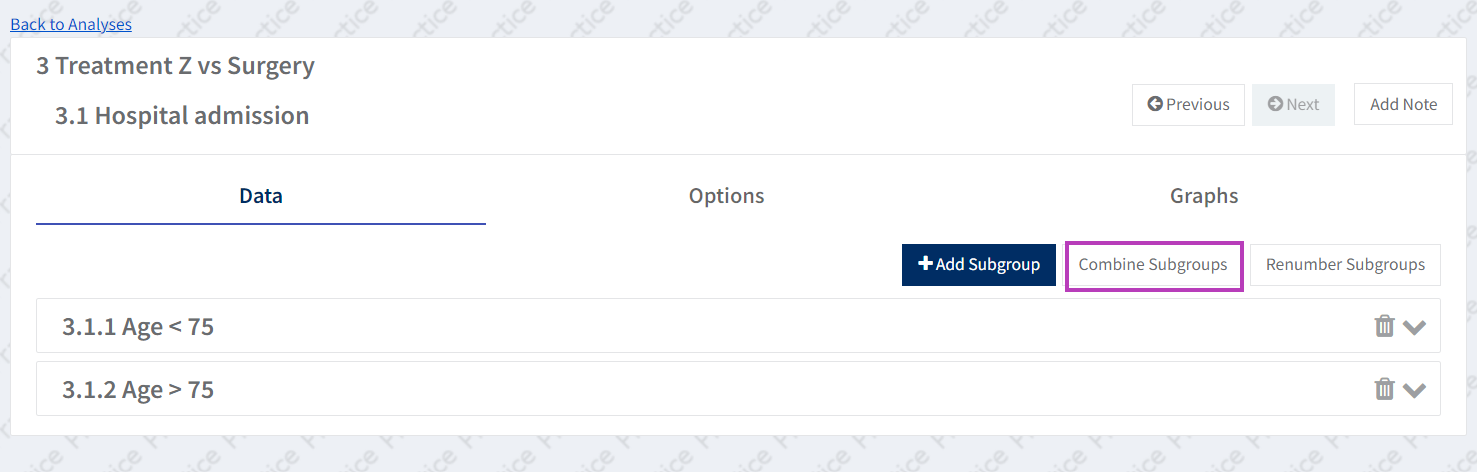
When you've entered the study data for the first subgroup, you can create one or more additional subgroups by clicking again on 'Add subgroup'. Enter data in the table as for the first subgroup.
Select the 'Graphs' tab to view the forest plot with the subgroup analysis (see Manual-input analyses for more details)).
3. Combine subgroups
You can combine the existing subgroups by clicking on the 'Combine subgroups' button.
The subgroup titles will disappear and all the included studies and data will be listed together.
Note that combining subgroups cannot be undone – if you want to revert to the subgroups, you will need to recreate them – see the next point (below).
4. Creating subgroups from the existing outcome
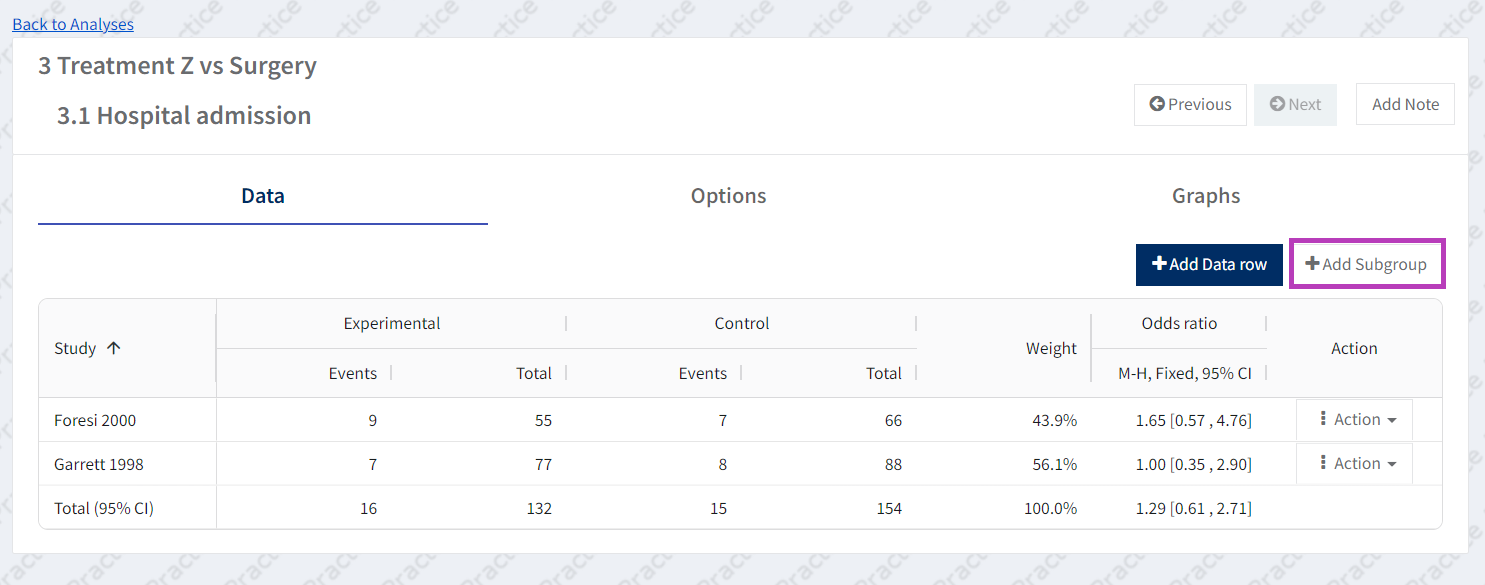
If studies and data have already been added to an outcome and you want to use subgroups for that outcome, simply click on the ‘Add subgroup’ button. All the studies for this outcome will be incorporated in the first subgroup.
5. Move studies between subgroups
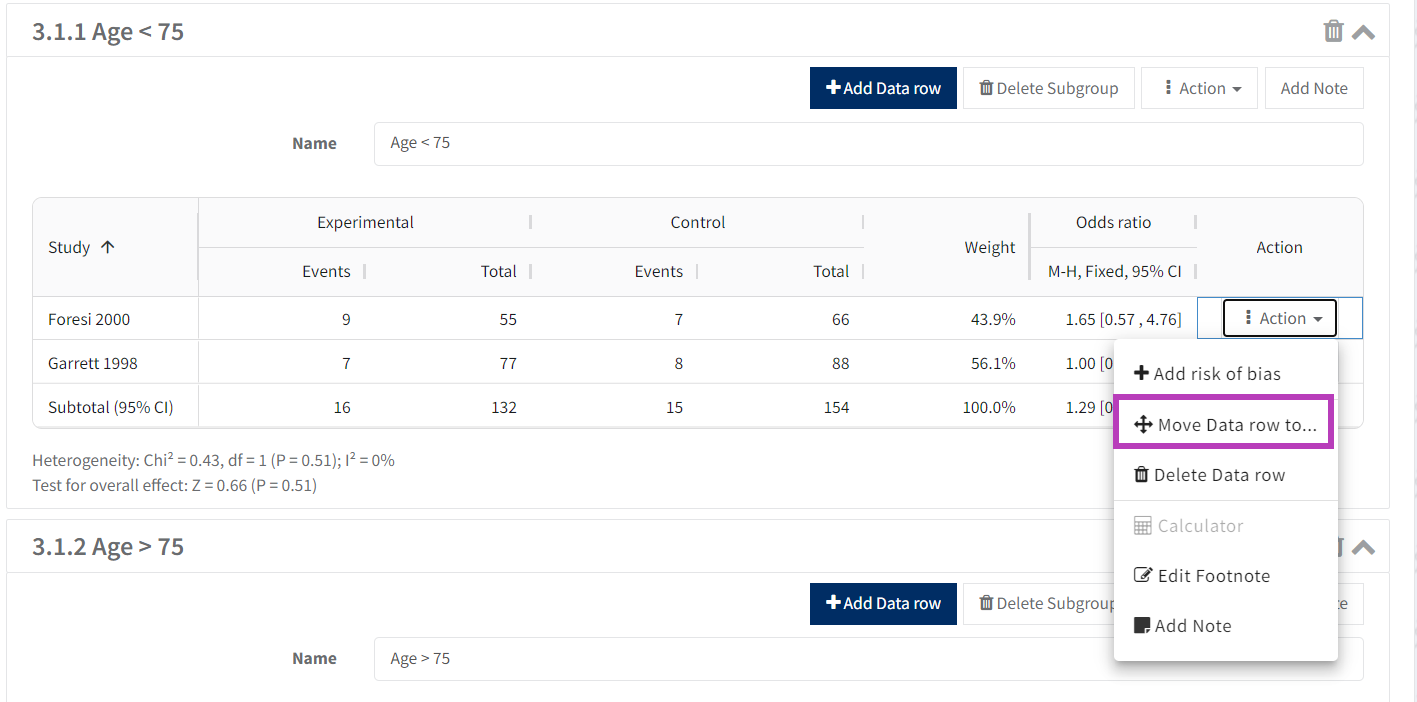
You can then create additional subgroup(s) and move the studies from one subgroup to another. Click on the ‘Action’ button corresponding to the study that you want to move, select 'Move data row to' and choose the destination subgroup.
6. Delete subgroups
Expand the relevant analysis to display all the analysis subgroups. Select the bin icon next to the subgroup analysis that you want to delete, or click on Delete Subgroup button.